Fix of Powerpoint 2007 Not Accepting Chinese/Japanese Input

I seldom use Powerpoint because I am kind of dislike it. I especially dislike the slides made with company’s official templates: if those logos and fancy things are removed, a lot of ink will be saved when printing it. If Powerpoint is not used, all those contents are condensed into a Word or Excel document, a lot of trees will be saved (maybe Powerpoint files are not supposed to be printed out at all, since they are slides, and should be played on the screen with a projector). And this can also save a lot of money for the companies, especially in such a bad economy.

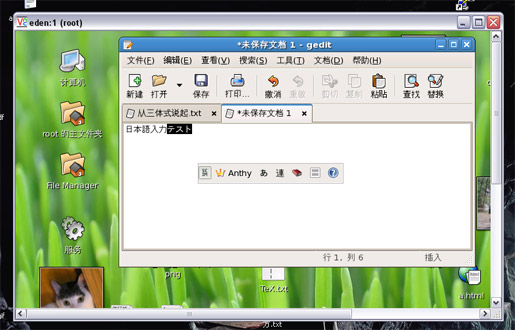
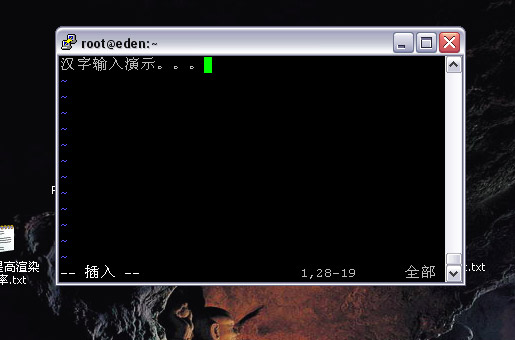
Today, when I tried to use Powerpoint 2007 at home for the FIRST time (I even hesitated if I should have installed it or not when I installed Office 2007), I was astonished that I cannot type Chinese in it! Nor Japanese can be input. But if I type some Chinese characters into a text editor, and do a copy-and-paste, it shows in Powerpoint properly.

According to some investigations via internet, it seems to be caused by a Windows XP update. BTW, my Office 2007 was installed in Windows XP, I don’t have later versions of Windows at hand, so I am not sure if this applies to other Windows or not.

The fix is relatively straightforward, but the Registry should be modified. I made a .reg file for this. Just right click on it and choose “Merge” in popup menu. It takes effect at once without restarting Windows or Powerpoint. It works for both Chinese and Japanese input (I guess it may also work for other languages such as Korean but I am not sure). But this is totally at your own risk, ie. I won’t be responsible for any damages caused by using this file. So if you want to use this, please backup the Registry first (I didn’t though).
Right-click here and choose “Save Link As” to download fix-powerpoint-2007-chinese-japanese-input.reg

Published
Categorized as IT Tagged

Block Access from a Range of IP Addresses

There are some guys from certain locales who keep posting spamming comments to my web site on a daily basis. Although most of them were caught automatically and won’t be shown, yet some of the spammers spam so frequently with very big posts, it’s really annoying to delete these periodically in order to avoid the waste of resourses.

Analyzing the IP addresses of these spammers, we can find that some of the most active spammers use a different IP address every time (they may intentionally use dynamic IP address provided by their ISP’s), so that you can hardly block them, for enumerating all the IP addresses in config files of Apache or firewall is very tedious. But fortunately, all these IP addresses belong to the same IP range (I think that the spammer didn’t use a proxy), and normal internet surfers from this IP range are hardly willing to browse my web site due to language / locale / interest reasons. So we can simply block the access from all IP addresses in this range. For this reason, I created this “IP Range Calculator” online tool to make this process easier: it does the tedious IP address mask & CIDR calculation and generates firewall commands as well as proper lines for Apache’s config file.

Here is a real example. Note that I don’t have any discrimination to people or IP addresses in this range, just as I said, a real surfer from this range won’t actually browse my web site, and the only ones who do access my web site are usually spammers. So it’s not unfair to restrict access from this range.

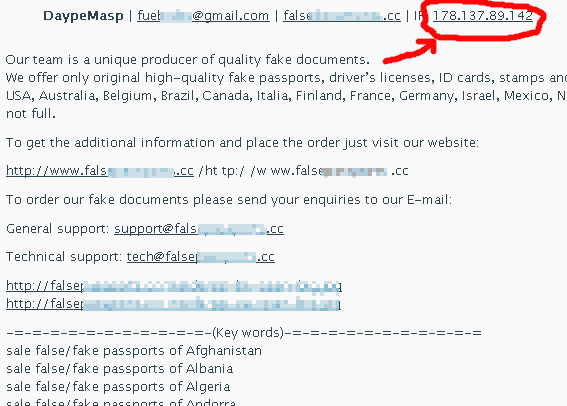
First, get one of the most frequent spammer’s IP addresses:

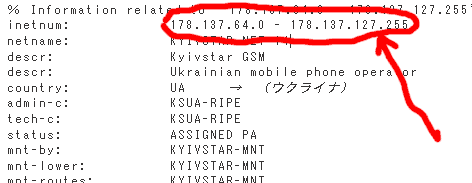
Then use “whois” service to get the IP range:

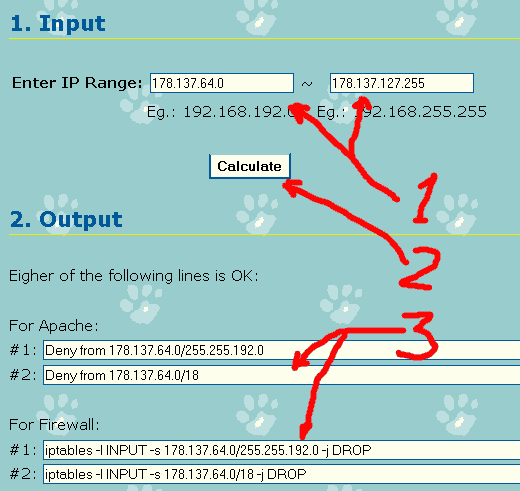
Now launch the “IP Range Calculator“, enter the IP range got from whois, and click “Calculate” button. Then the calculation result is used to generate related firewall commands and lines for Apache config file to block the IP addresses. You can use either of them according to your needs.

How to setup VNC

Task: setup VNC in Linux box, so that we can access the Linux box with GUI from windows PC.

On Server Side (Linux):

Install VNC server if it’s not yet installed.

Add allowed VNC client’s IP address in /etc/hosts.allow

Xvnc:192.168.0.10  # supposing your PC's address is this one

Set VNC password

> vncpasswd

Start VNC server once to generate startup script, and then stop it

> vncserver
> vncserver -kill :1

Edit startup script: ~/.vnc/xstartup

  • comment out “twm &”
  • add following lines to use Gnome and Chinese/Japanese input methods
export GTK_IM_MODULE="scim"
scim -d &
gnome-session &

Open port 5901 (when needed, 5902/5903/…) in firewall

Start VNC server

> vncserver

On Client Side (PC):

Windows:

Install VNC client software (such as RealVNC), and connect to Linux server.

Mac:

Choose “Move | Connect to server” in menu bar, and type in following address:

vcn://server_host_name:5901

Notes:

1. In order to use Chinese/Japanese input method (scim) in Linux, hotkey “<CTRL>-<SPACE>” in PC should be disabled, otherwise scim cannot be launched. This hotkey usually comes from Chinese input method in Windows.

2. In order to input Chinese/Japanese in Linux, on client (PC) side, IME should be turned off (i.e. English).

3. For security reasons, it’s a good practice to start VNC server in Linux only when needed, instead of making it a auto-started service. This can be done with a terminal software (such as PuTTY).

4. I did this because I wanted to access a Linux server from a PC, and I needed Chinese/Japanese support. But after doing so, I found out that PuTTY actually supports Chinese/Japanese: in its config dialog, click “Window | Translation”, then set “Received data assumed to be in which character set” to “UTF-8”. Then the Chinese/Japanese input methods in PC can be used directly in this terminal! (if it still doesn’t work, then do the following two things: 1, click “Windows | Appearance” and choose a proper font; 2, in vi, do “:set enc=utf-8”.)

5. ssh tunneling way to do it:

  • in Cygwin, execute this command: ssh -NTf -L 5901:localhost:5901 <user>@<linux-server-host-name>
  • in command prompt, change dir to “C:\Program Files\RealVNC\VNC Viewer” (or the right place), and execute this command: vncviewer localhost:5901
Published
Categorized as IT Tagged ,

MacBook and Windows

Ideally, we should only use OS X in a MacBook, that’s why Mac should be used anyway, since Apple used a lot of proprietary things that optimizes the performance of the whole system. But due to Microsoft’s huge influence, no matter we’d like to admit it or not, there are many reasons for which we have to use Windows. A few examples include:

  • Microsoft Office: of course, there are Mac versions, but GUIs are different, and you need to pay for them again…
  • Visual Studio: good IDE for C++, and good RAD tool like VB and C#, etc.
  • Windows Live Mail: if you have some Hotmail accounts for historical reasons like me, you will find it very handy.
  • IE: oops, but there are some banks like those in China with out-of-date tech that requires this.

So I managed to install Windows right after I got my MacBook. It was a pain by the way, since my Windows XP installation CD is the MSDN version, with more than one versions of Windows in one CD, this proved to have problem installing: Mac’s Boot Camp failed to handle the prompt of choosing Windows to install. So I had to customize and burn a CD with only one version of Windows…

It seems that there are still some issues with Boot Camp. I feel the following two major ones annoying:

  • It consumes more resources: When I use OS X, the temperature of the machine is fine; while when I boot to Windows, it’s hot, even when it’s not busy (for example, just put it there without doing anything). I think that this could be caused by Boot Camp since Windows XP is not that bad.
  • The Blue Screen of Death occurs occasionally. This seldom happens (in fact, almost not) in my previous PCs and notebooks. So this may also be caused by Boot Camp.

Although there are these problems, I still enjoy using Windows in MacBook. One good thing is that this notebook has 4GB RAM, while Windows XP can only use 3GB. So I used the extra 1GB to create a RAM disk, and I configured the system to use this place to store garbages like temp files and cache data of web browsers. This is really cool.

Note: After I wrote this article, I found in Microsoft’s web site that Windows XP can also be configured to use 4GB of memory. But I still keep the current settings since I really feel the idea of having a 1GB RAM disk is very cool…

Published
Categorized as IT

Setup Web Dev Env in MacBook

Since Apple’s MacBook notebook uses OS/X that is built on top of Unix, it’s very like a server environment (while in Windows, we need to install something like Cygwin). So we can use this as a development environment. The problem is that it’s not so apparent to find where and how Apple organizes the things. For web development, it’s as follows:

Apache2

Apache2 is pre-installed.

  • script: apachectl (in path)
  • config: /etc/apache2/*
  • htdocs: /Users/<user_id>/Sites
  • URL: http://localhost/~user_id/
  • log: /var/log/apache2/*

PHP

PHP 5 is also pre-installed, we need to enable it in Apache’s config file: uncomment the line with ‘php’:

LoadModule php5_module        libexec/apache2/libphp5.so

add php type in “<IfModule mime_module>” block as follows:

AddType application/x-httpd-php .php
AddType application/x-httpd-php-source .phps

Restart Apache, we can pass the php test by creating a test.php as follows and put it in ‘Sites’ dir:

<?php phpinfo(); ?>

Perl & CGI

Now comes the good-old Perl CGI. According to Apache’s configuration, the CGI dir is “/Library/WebServer/CGI-Executables”, it’s mapped to URL “http://localhost/cgi-bin”. To make it easier, we can create a soft link in home dir:

ln -s /Library/WebServer/CGI-Executables Cgi

Now it can be tested with following script:

#!/usr/bin/perl -wT

print "Content-Type: text/plain\n\n";

print "Hello CGI!\n";

mod_perl

Add following lines in proper  places:

 # load it
 LoadModule perl_module        libexec/apache2/mod_perl.so

# add a place to test mod_perl scripts
 ScriptAliasMatch ... (omitted, refer to the CGI one)

 <Directory "/var/www/cgi-bin/mod_perl">
 SetHandler perl-script
 PerlHandler ModPerl::Registry
 Options +ExecCGI
 PerlOptions +ParseHeaders
 </Directory>

Now we are pretty much done. The only remaining thing that is good to have is MySQL…

Published
Categorized as IT

Grab the Internet Trouble Makers!

There are a lot of people trying to crack or spam others’ web sites (in vain)… What they usually do can be categorized into two types: one is trying to post their articles (usually advertisements for drugs and so on) automatically to a lot of forums; the other one is trying to download files that the web masters might put there carelessly (for example, *.mdb, web.zip, etc.).

I don’t care about this too much, unless they keep doing this all the time, which consumes my band width. In order to grab them out and filter their requests out using a firewall, I did the follows:

First, in Apache’s configuration file, filter all these suspecious requests into a separate log file. For example, I am using Apache in Linux, but if someone requests for /forum/post.asp, or /data.mdb, then it’s for sure that they are from crackers or spammers. I put all of these in a file called worm_log (these things used to be from worms…).

Then I wrote a small script to calculate the number of hostile requests:

#!/bin/sh

allIPFile=/tmp/ips.txt
ipListFile=/tmp/ip_list.txt

myTmpFile=/tmp/mytmp.txt

cat worm* | cut -d ' ' -f 1 | sort > $allIPFile

cat $allIPFile | uniq > $ipListFile

lines=`cat $ipListFile`

rm -f $myTmpFile > /dev/null 2>&1

for ip in $lines ; do
        n=`grep $ip $allIPFile | wc -l`
        echo "$ip: $n" >> $myTmpFile
done

cat $myTmpFile | sort -nr -k 2,2 > spammers.txt

The output is something as follows:

222.73.173.10: 404
58.215.65.183: 355
222.73.173.11: 351
210.83.81.80: 314
121.14.212.82: 140
118.102.26.197: 117
221.231.114.10: 56
221.5.6.198: 48
...

Now we are very clear about who are the top trouble makers and should be blocked out of the firewall.

Published
Categorized as IT Tagged ,